Horse Eden Eventing Game


Year: 192   Season: Fall   
$: 0
Forecast: Crisp, Clear, and Cool
Forecast:
Wed 12:35pm  
Stables Online:  134 
Chatbox
Sunni
12:34:42 Sunni bunny
Thank you cove, I am really hoping so.
It's over an hour drive but I'll take whatever I can get.
This Friday is our last day at Freightliner.
They laid off a lot of people.
Glacier Bay Cove
12:33:35 Arctic Katz
Good luck and I hope you get the job, Sunni
MakeEm Fancy
12:31:48 Ally 💜
Yep just got a time of 9 minutes for crafting a rusty bit
Snitches' Stitches
12:30:52 Snitch
Blue,
except I've gotten times ranging from 0m all the way to 10m after just clicking into the crafting
Stormsong Manor
12:28:04 Ven
Two or three Sherpas for one Adv
Circle Star RIDs
12:26:16 Granny C
I'd like to be able to craft Adventure maps.
ArcticLights
12:23:53 Ceci / (Call me) AL
Hope so, it would be a big quality of life update since crafting have to be something people do on a daily basis
Glacier Bay Cove
12:19:36 Arctic Katz
Maybe multiple crafting items will be added in a future game update
Amelia Stormhand
12:17:26 Mia / Storm
-HEE Click-

Wasn’t expecting that bravery lol I’ll take it tho!
Bluegrass Racing
12:16:27 Blue
Crafting is based on the server time. So bits take 10 minutes, if you do one now at 12:15 it will take 5 minutes to 12:20. at 12:20 it will take 10 minutes to 12:30
Sunni
12:16:01 Sunni bunny
Wish me luck I got a message about a job opportunity.
I hope they bring me in for an interview.
Sunni
12:15:40 Sunni bunny
Hi rainy
Hi Ebony
Snitches' Stitches
12:13:48 Snitch
I literally got a "0h 0m" crafting time once for rusty bits
Snitches' Stitches
12:10:54 Snitch
Or at the very least it'd be nice if crafting time wasn't randomized
Rainbow
12:10:45 Rainy/Prism/Chrome
Snitch
Me too
Glacier Bay Cove
12:09:51 Arctic Katz
I would like that as well, Snitch
Snitches' Stitches
12:09:10 Snitch
I wish we could craft multiples of things and just have it take more time. Like maybe max it out at like 5 or 10
Dark Horse Eventing
12:07:41 Ebony
Hello everybody!
Rainbow
12:06:18 Rainy/Prism/Chrome
Hi Sunni
Sunni
12:05:49 Sunni bunny
Hi everyone,

You must be a registered member for more
than 1 day before you can use our chatbox.


Rules   Hide
You are in: Main Chat
View Sales Chat
Quests
Horse Eden Eventing Game
Chatbox
Sunni
12:34:42 Sunni bunny
Thank you cove, I am really hoping so.
It's over an hour drive but I'll take whatever I can get.
This Friday is our last day at Freightliner.
They laid off a lot of people.
Glacier Bay Cove
12:33:35 Arctic Katz
Good luck and I hope you get the job, Sunni
MakeEm Fancy
12:31:48 Ally 💜
Yep just got a time of 9 minutes for crafting a rusty bit
Snitches' Stitches
12:30:52 Snitch
Blue,
except I've gotten times ranging from 0m all the way to 10m after just clicking into the crafting
Stormsong Manor
12:28:04 Ven
Two or three Sherpas for one Adv
Circle Star RIDs
12:26:16 Granny C
I'd like to be able to craft Adventure maps.
ArcticLights
12:23:53 Ceci / (Call me) AL
Hope so, it would be a big quality of life update since crafting have to be something people do on a daily basis
Glacier Bay Cove
12:19:36 Arctic Katz
Maybe multiple crafting items will be added in a future game update
Amelia Stormhand
12:17:26 Mia / Storm
-HEE Click-

Wasn’t expecting that bravery lol I’ll take it tho!
Bluegrass Racing
12:16:27 Blue
Crafting is based on the server time. So bits take 10 minutes, if you do one now at 12:15 it will take 5 minutes to 12:20. at 12:20 it will take 10 minutes to 12:30
Sunni
12:16:01 Sunni bunny
Wish me luck I got a message about a job opportunity.
I hope they bring me in for an interview.
Sunni
12:15:40 Sunni bunny
Hi rainy
Hi Ebony
Snitches' Stitches
12:13:48 Snitch
I literally got a "0h 0m" crafting time once for rusty bits
Snitches' Stitches
12:10:54 Snitch
Or at the very least it'd be nice if crafting time wasn't randomized
Rainbow
12:10:45 Rainy/Prism/Chrome
Snitch
Me too
Glacier Bay Cove
12:09:51 Arctic Katz
I would like that as well, Snitch
Snitches' Stitches
12:09:10 Snitch
I wish we could craft multiples of things and just have it take more time. Like maybe max it out at like 5 or 10
Dark Horse Eventing
12:07:41 Ebony
Hello everybody!
Rainbow
12:06:18 Rainy/Prism/Chrome
Hi Sunni
Sunni
12:05:49 Sunni bunny
Hi everyone,

You must be a registered member for more
than 1 day before you can use our chatbox.


Refresh


Forums

→ Horse Eden is a fun game! Sign Up Now!

My Subscriptions
My Bookmarks
My Topics
Latest Topics
Following

Forums > Art Shops > Art Help
   1 

Drawing Hair Without a Tablet January 6, 2018 04:18 PM


The Old Gods
 
Posts: 1072
#105435
Give Award
If you're using GIMP, you can completely skip my tutorial and go here: https://aliyaahgrl.deviantart.com/art/Realistic-Hair-Tutorial-373769257 This is more geared towards GIMP users while my tutorial is geared towards photoshop users.

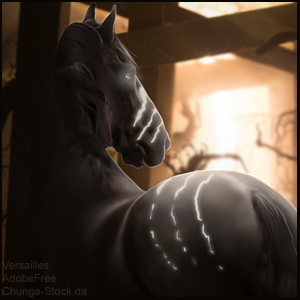
This is a two part tutorial. Part 1 will cover how to draw the hair and assumes you'll be creating a mane/tail from scratch. Part 2 will apply a lot of what`s in Part 1 to touch-ups on a pre-cut horse.

The Setup
The brush set up is the most important part and the key to drawing out hair. Once you have your canvas set up, go to your brushes, click "other dynamics" and "fade". This causes your brush strokes to gradually fade away and results in that nice whispy look. The amount of fade you use will depend heavily on what you're doing and your canvas size. In general, the smaller the number, the more fading.

http://u.cubeupload.com/Demonically/4b11.png

Next, pick one of the default round brushes. Set the hardness to 85% or thereabouts. Don't touch the opacity;that'll be for later.

http://u.cubeupload.com/Demonically/6b32.png

Drawing It Out
Pick your colors. I'm using 6 colors plus "white". I sort of go in a lazy arc towards pure white, but never use pure white or pure black. If you do, use it at a low opacity. What you’`re wanting to do is start with the darkest color and work your way up to the lightest using progressively smaller brushes. The final, lightest color will be using a 1px brush for highlights. You don`’t have to use as many layers/colors if you’`re working small since a lot of the detail will be lost. However, if you like uploading the full sized, finished image to DA like I do, going the extra mile can add that final pop to an image.

http://u.cubeupload.com/Demonically/44f3.png

Anyway, set to work blocking out the shape of the hair; here, I'm using a 10px brush. Don't be afraid to squiggle. Hair isn't pretty. It's messy, wild, and goes all over the place. Think perpetual morning hair and not “spent "3 hours at the salon"”. You'll want to keep the hair closest to the body/neck the darkest and lighter the further away it goes.

http://u.cubeupload.com/Demonically/de25.png

Once everything is nicely blocked out, pick your next color,make a new layer, and drop down to a 4 or 5px brush and bump your fade number,if needed (I went from 200 to 300). At this point, I can’t stress enough the importance of layers. It can be the difference of only having to redo a layer and drop kicking your computer because the whole thing is ruined. Colors two and tree are really where you define the shape/shadows of the hair, so be prepared to spend more time on those.

http://u.cubeupload.com/Demonically/b964.png

Already with a little bit of work, the shape of the tail is starting to come out. Don’t worry about the thick brushstrokes of the base layer. Those can be erased later. Right now, it’s just to give you a general idea of where you want to paint.

http://u.cubeupload.com/Demonically/4916.png

When you finish with color two, make a new layer, drop down a brush size, and continue on. At this point, you can start adding little details like fly away hair clumps.

http://u.cubeupload.com/Demonically/de98.png http://u.cubeupload.com/Demonically/70710.png

Once you’re about half way through your colors, grab the smudge tool. 4% strength, round brush, 0% hardness, about 10-13px. Lightly brush over the spots where you can see where you started the brush stroke. Make sure to follow the hair; your goal here is to smooth, not blur. At this point,drop the opacity of your main brush down to about 80%. Start following the more obvious highlighted areas. Lightly smudge as needed.

http://u.cubeupload.com/Demonically/58c9.png

For the final two colors, switch to a 1px brush and just selectively highlight areas. Be more liberal with your smudging, as well. Also,don’t be afraid to go back and do more hair on the lower layers. I wasn`’t happy with the above product, so I decided to go back and add more hair.

http://u.cubeupload.com/Demonically/12.png http://u.cubeupload.com/Demonically/11.png http://u.cubeupload.com/Demonically/13.png

Edited at January 6, 2018 05:25 PM by Eurynome
Drawing Hair Without a Tablet January 6, 2018 04:20 PM


The Old Gods
 
Posts: 1072
#105436
Give Award
This uses the same method as before, but applied to a horse. Same brush settings. This time, sample colors from the horse's (rather pathetic) tail. We're only going to use 4 colors this time around. Block out the shape, don't worry about being pretty.

http://u.cubeupload.com/Demonically/9e71.png

Start building up the color layers like in part 1.

http://u.cubeupload.com/Demonically/1b32.png

http://u.cubeupload.com/Demonically/6a43.png

Good 'nuff.

http://u.cubeupload.com/Demonically/7ea4.png

Do any clean up work (such as getting rid of the big hairs). Now, in order to blend it, duplicate your tail layers by ctrl + click, right click "duplicate layers". You'll have a bunch of "[Layer name] copy". Make sure those are still highlighted. Right click, merge layers. Now hide your original layers so that the only tail layer is your merged copy.

http://u.cubeupload.com/Demonically/2795.png

Grab a fuzzy round eraser, set it to about 20% opacity. Start erasing the top of the tail.

http://u.cubeupload.com/Demonically/7bf6.png

New layer. Sample colors from the horse's tail in areas close to the drawn on tail. Start painting over the new tail. If needed, do a bet of painting on the old tail to help sell it.

http://u.cubeupload.com/Demonically/abb7.png

Now, the biggest glaring issue is that the new tail is a touch lighter than the original tail. Easily fixed. Make sure your tail layer copy is selected. Ctrl + M brings up the "curves" window. See the angular line? Click on it in the middle and slowly pull it down a bit. Different areas will affect the layer differently. Experiment!

http://u.cubeupload.com/Demonically/7548.png

Just a tiny adjustment made a big change.

http://u.cubeupload.com/Demonically/4ab9.png

Edited at January 6, 2018 05:21 PM by Eurynome
Drawing Hair Without a Tablet January 7, 2018 12:55 AM

Former Stable
 
Posts: 0
#105654
Give Award
Yay! Thanks Eury!!

Forums > Art Shops > Art Help
   1 

Refresh