After multiple failed attempts xD I've finally compiled an art tutorial!
(currently a WIP! this will essentially grow with this piece xD)
-
Info:
- I work on an ungodly sized canvas of 3500x5000
- My main brushes are Chalk, Airbrush (triangle), and Round Brush (rough)
- I am one squirrely artist, so i jump around quite a bit!
-
First! You want to get your stock cut out and postitioned on your bg (See my blog <3) and then use filters-> grayscale and play with settings to get that nice gray pony!
-
Step one, Body prep!
-Before you start body prep, duplicate your prep-less horse layer and turn it off, you'll need it later!-
I like to use the chalk brush on pure white for highlights, and pure black for shadows. I start with the highlights and just pop those wherever muscles/bones/etc appear, then i go in with shades on the oppostite to where i put the highlights, as well as in darker crevices :)
-
Step two
Now, time to smudge! (Only smudge you're current visible body prep layer!)
I use smudge on 21% opacity (shoutout to Zomb xD) And just go in and really smooth that pony out. After that, i turn back on the layer we made in step 1, and make out body prep layer clip it. I then adjust the opacity of the body preplayer to around 70% depending on the stock <3
(I didn't get a picture of it all lowered opacity, so use your imagination TvT)
-Now that you haveit clipping the non prepped one, put both in a folder)
-
Step three
Now, since this is a grey horse, i won't be doing any color besides any pink/grey points, for other coats, put a clipping layer above and set the blending mode to color<3 So, Markings! I use a lasso to get my markings, go down to my horse folder, and select "Add layer from folder" This should give you your markings on their own layer. Set those to clip your folder, then navigate to filters-> hue saturation lightness, and play with lightness <3
-
Step four
Mapping hair!
-
For this you need Round Brush (rough) and turn on force fade!
-
I like to start with a rough plan like this:
then slowly fill it in, one stroke at a time, for this first layer i use a 15.5 pxl brush, but adjust as needed!
Now, fill in all those gaps with the brush not on force fade (you'll thank me xD) and then go in with smaller and smaller brushes in the same way you did the first bit, it should look a bit like this :)
(I use 15.5 for first shape, then 10.5, then 5.0)
regretably due to formatting issues :') these few are vertical ToT I might fix it later lol
be sure to erase any stray marks that go over your horse to get a clean map like so,
-
Now, we pause hair xD
-
Step five
Jewelry! I wanted this piece to be my tutorial piece as it has jewelry, so first you want to map out where your jewelry is going (please ignore the eye as of now, we'll get to it <3)
Now, go over your mapping with your actual jewelry color, i chose gold as it will contrast the grey nicely, and meld with the warmer tones of the sky <3
-
Step 6
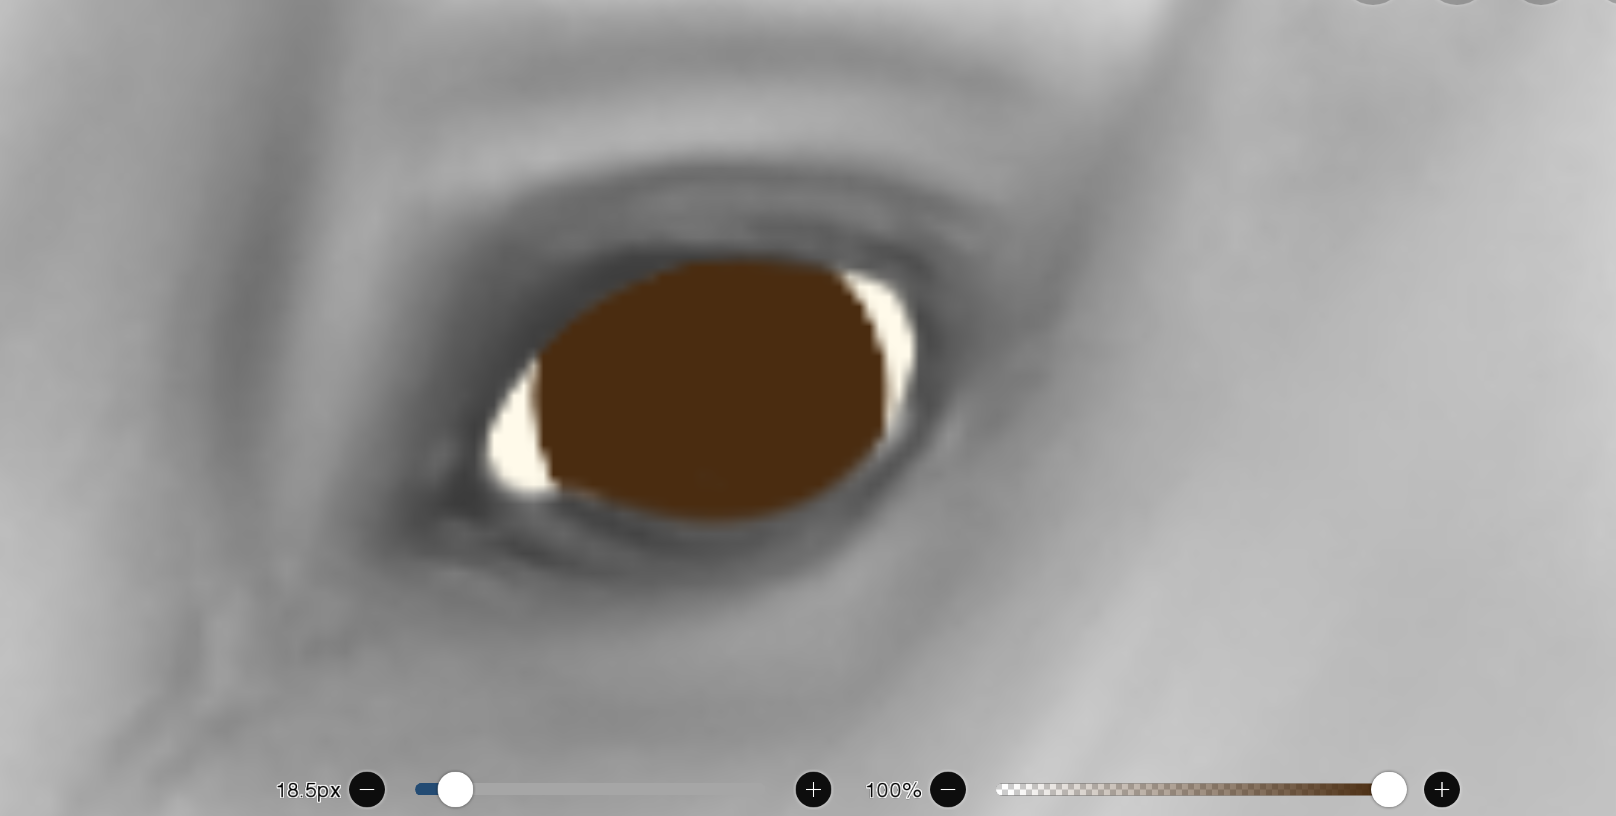
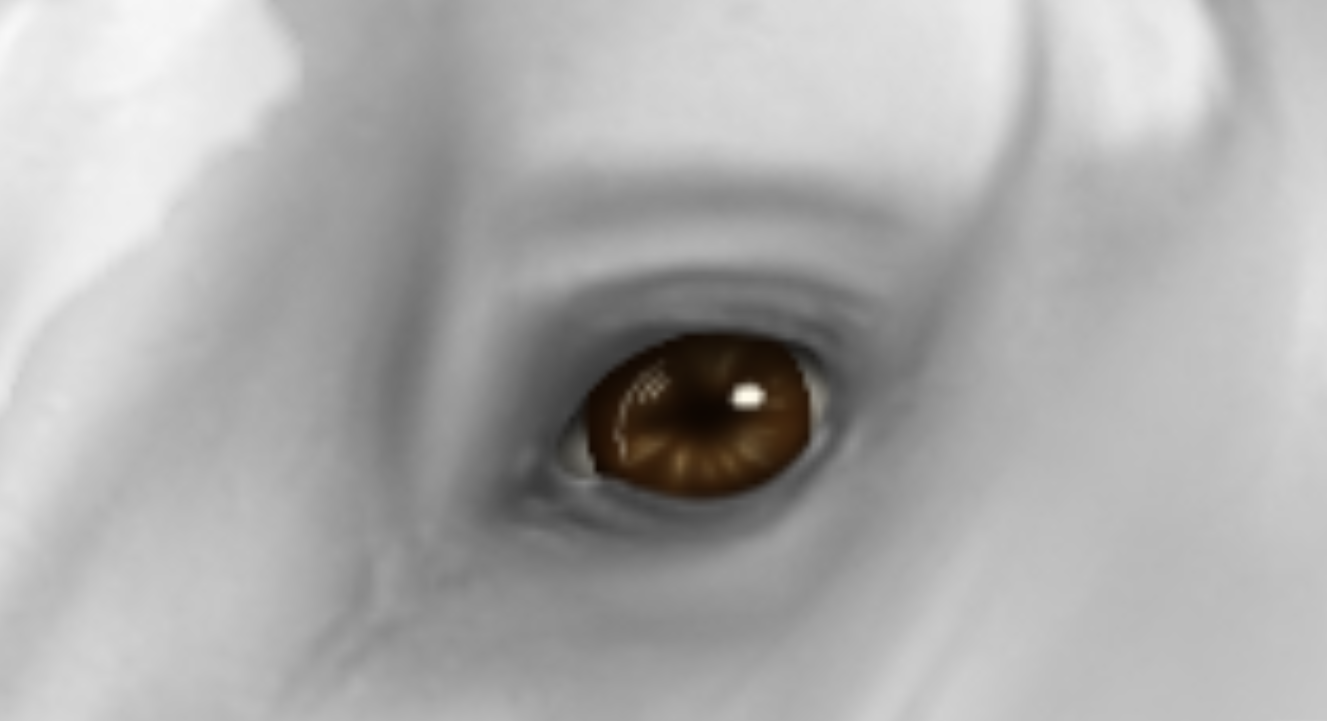
Now that you've got that out of the way, the eye!
i start by going under your horse layer and putting a layer of white/light grey. Then you want to put down your base color
Now, make two layers that clip just your pupil. On the lower one, go in with a lighter color and start to form the iris. On the upper one, go in with a darker color and put that on the outer edge and the center
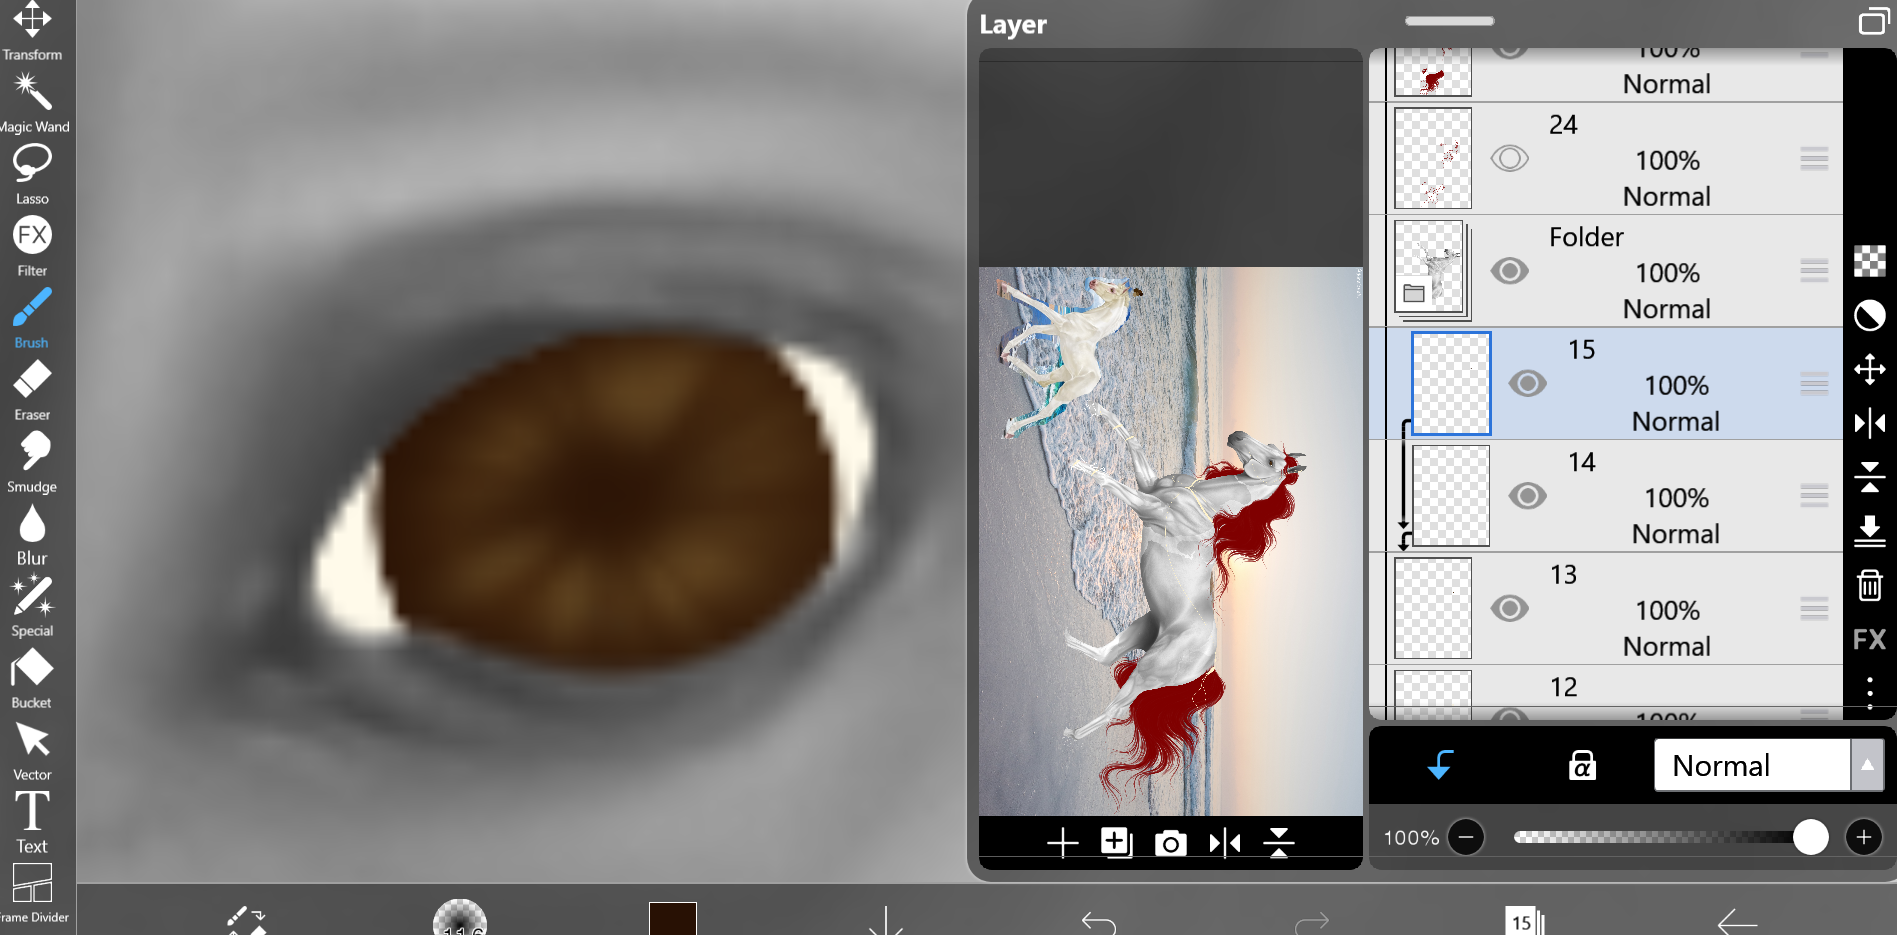
Now, go up one layer from your first iris layer, and airbrush an even lighter shade on those high points
Now, make a clipping layer on top of this all, and go in with black to the very center of your eye, and the outer edges/top again. after that, pop on your final lil white relflection, and your done!
-
You should have something like this <3
This is all for now! I'll be updating as i go, so please be patient with me lol! <3
 Clear with Temps dropping into the Teens